skip to main |
skip to sidebar
The other two versions worked, but I still wasn’t entirely happy with them.
Sooo....back to the drawing board. Main thing I didn’t like about the second go around was the zippered top opening. Thought a flap might work better. Wanted to carry all the stuff that went into the original two versions, but I also wanted to carry some more stuff. Redundant perhaps, but I wanted to carry my Leatherman Wave as well as the Victorinox Huntsman. The bits that accompany the LM. A PocketWrench 2. A pen. A lighter. Having the battery die in the flashlight is annoying, so wanted to have a way to carry extra batteries as well.
I’d seen the Skinths, and thought they had some cool features. But while Eric is a good guy, buying one from him would deprive me of the fun of making my own thing, and there were a bunch of my own features I wanted to add.
I could have gone narrow and thick, and instead opted to go with wide and thin.
Like Soviet weaponry, it’s not pretty, but it’s effective.
First component for the four main tools. The two white bits at the bottom...
....are Spectra cord that I used to hold the pen in place.
The back/flap component for the four flat tools/items.
The two side by side.
The third front and sides component. Decided to add a SliverGripper to the side as well.
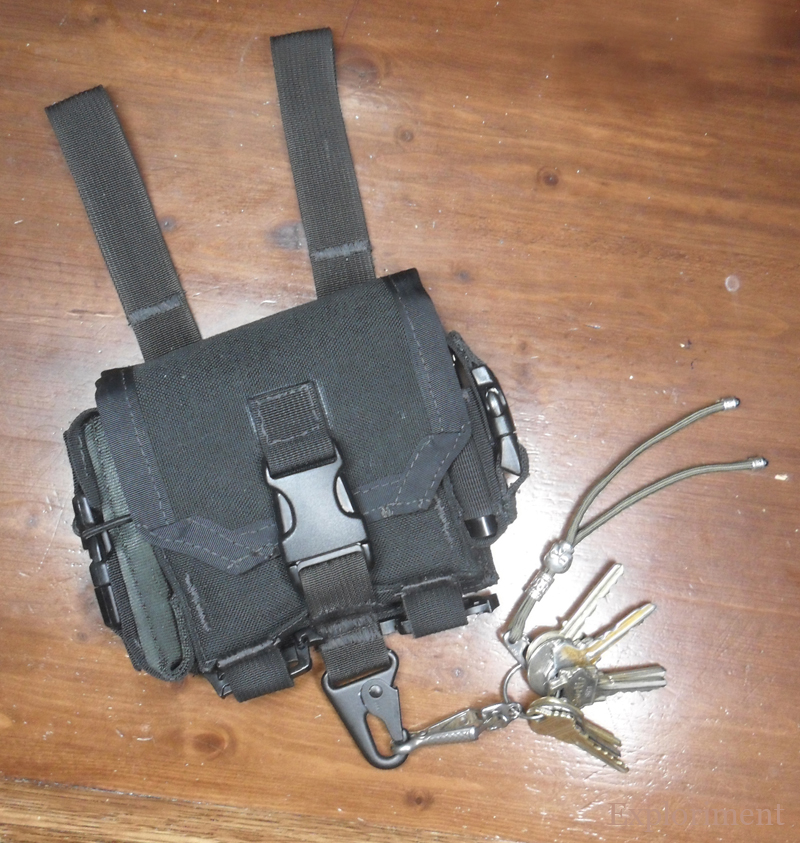
All three components combined. I added an H&K hook to it to hang keys on.
The size of the whole thing is about 180 cm (7") by 120 cm (5") by 50 cm (2"). The main pouch is about 110 cm (4.5") by 105 cm (4") by 30 cm (1.25"). And the weight of it is a heavy 1 kg (2.2 lbs.).
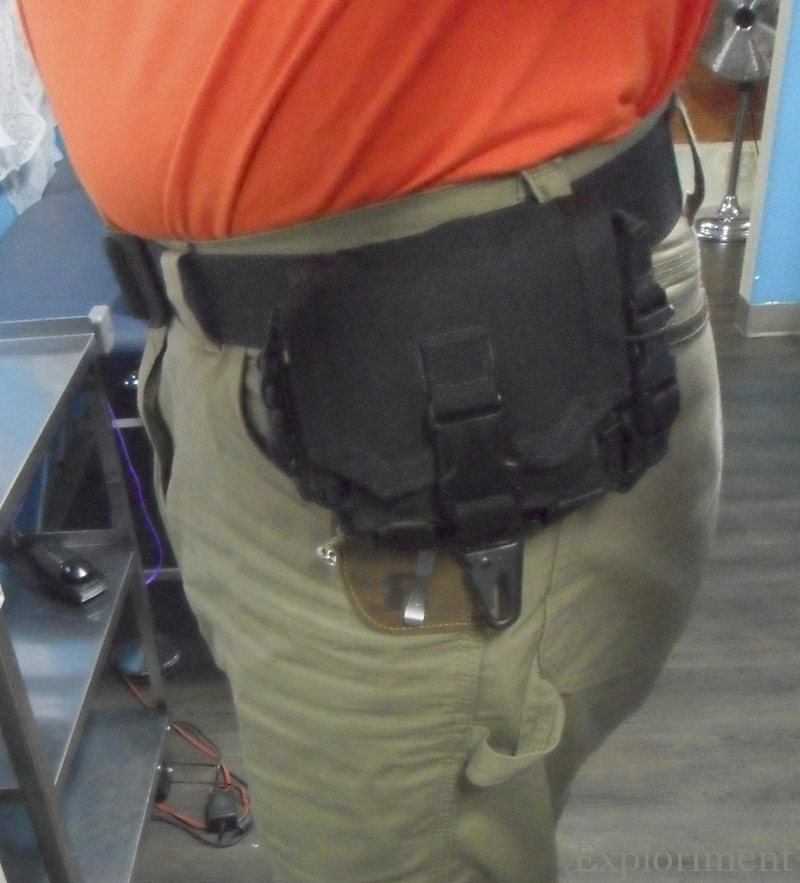
The back side. One change I made to the whole set up was to have straps that I could detach at the bottom. This way I can either have it high up on the belt, or drop it down low so that when I’m wearing a backpack with a waist belt, it hangs down below that waist belt. Having that lump of stuff under a belt is really uncomfortable. Yet I still wanted to have this on my belt, on my person, so that if I ditch the pack I would still have it. This attachment system is known as BALLS - Belt Attachment Lowerable Loop System.
Viewed from above.
The front side, with a pouch for a lighter. It’ll hold a Bic, and any other similar sized disposable or refillable lighter. Hemmed and hawed about whether I should put the lighter on the inside, or maybe the flashlight or the SAK on the outside pouch. The lighter ended up on the outside. Maybe if I tackle version 4, it might not be there.
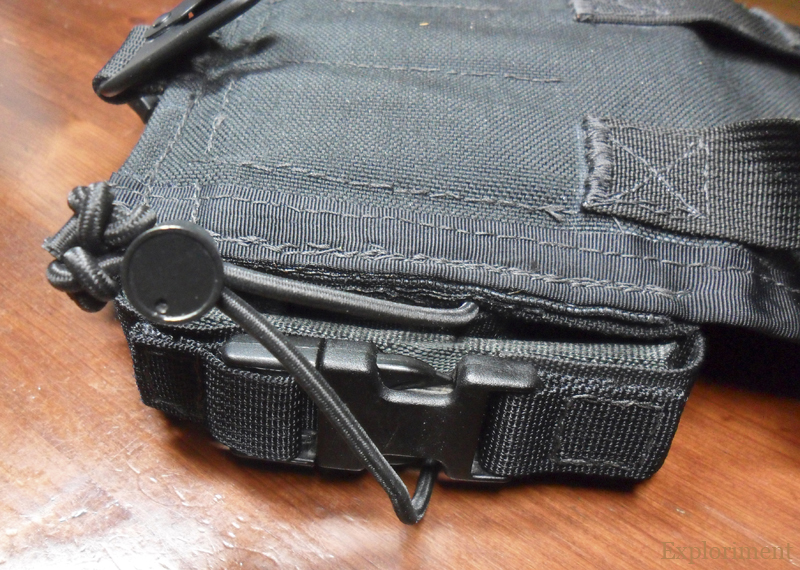
The back side, with a pouch for two AA batteries. I found that 1" tubular webbing is the perfect size to house the batteries. Made it so that it flips down to release them. One drawback to this approach is that I already knew that the tube would push loose from side to side, so I added some shock cord and a cord lock to help hold it in place. I put the batteries in facing a different direction and also put a circle of plastic between the two batteries to make sure they didn’t drain.
The contents.
Top row: Fisher Trekker Space Pen, Silva Matchcase, Leatherman Wave 2004, Victorinox Huntsman, Whistle, Fenix L1D, Bic Lighter
Bottom row: Sliver Grippers, PocketWrench 2, Leatherman Bit Kit, Brass Calipers, AA batteries
And here you can see it worn normally on the belt, and worn low on the belt.
The BALLS straps on the back also allow me to mount it on PALS webbing, like here on the Messenge’mups.
Oh yeah, and I sewed the whole thing by hand.
I suspect that like the other ones, I may find some flaws with this one after living with it for a while and tackle version 4. But for now, I’m happy with it.
I suppose you can figure by the “2” that I made an earlier iteration of this. It was okay, but I made it from a few different pieces, scraps essentially, and because of that it didn’t work quite right. Took another stab at it, and this one is a little closer, but wouldn’t you know it, this one is imperfect as well. But, that is par for the course when making things. Sometimes it is bang on the money from the start, other times it involves a bit of trial and error to get it just right.
The motivation didn’t change: a pouch to carry my Victorinox Huntsman, Fenix L1D flashlight and a Silva Matchcase. A knife (and a few other tools), a means of starting a fire, a compass and a light. All in a pouch with a few different mounting and carrying options.
It’s still about 4" by 4.5" by 1". Once again it’s made from ranger green 1000D Cordura.
Inside out views. I used some coyote brown seam tape, just because.
On the back I used some foliage green webbing for the belt loops as it’s the stiffest webbing I currently have. On the sides I used some scraps of OD webbing to form tabs.
The 1" gap between the two loops means that I can put a belt loop between them to prevent it from sliding around.
Drain hole on the bottom.
The zipper is a #8 YKK.
I changed the sinnets around from the ones in the 5th and 6th picture since they were a bit too bulky to fit comfortably inside the pouch.
Two different colours and styles to differentiate between them by sight and feel, and a loop on the flashlight so I can secure it around a finger or hook a lanyard to it.
Another difference from the other one is that I put a flap over the zipper.
Mounted on the Map’mups. First one with the zipper at the top, the second one turned on its side
Showing two mounting options – Siamese Slik-Clips and GrimLocs.
Mounted on a Kifaru OmniBelt.
When I’m wearing my pack, I can take the NyfFyrLyt right off of my pants belt and put it on the pack belt. (Really uncomfortable to have the pack belt over it.) However, as soon as I unbuckle the belt it slides right off and clatters to the ground. Not a big deal though, I just grab it and hold it when I do unbuckle the belt.
And the flaw I mentioned? I should have had the zipper come down over each side by ½" to 1" like I did in the original version. While it’s not an overwhelming problem, if I had done that it would make getting the items out a little easier.
Hhmmmmhhh, maybe I should go for version 3? I did go for version 3!