Tuesday, 4 September 2012

Kayak Build pt. 5

Planking.

What it is all about really.
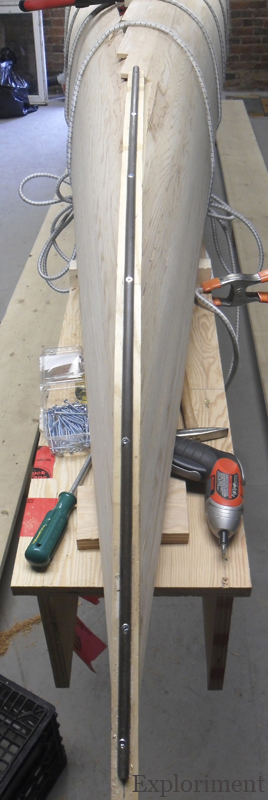
The first plank on the bottom is attached via brads (which will be removed later) and every one after that is glued and clamped/shockcorded into place.
This is the point where it starts to get tricky. (You can also see another trick we used to keep the planks in place: a smaller scrap of beaded wood held on to the stem with a brad. That also worked well.)
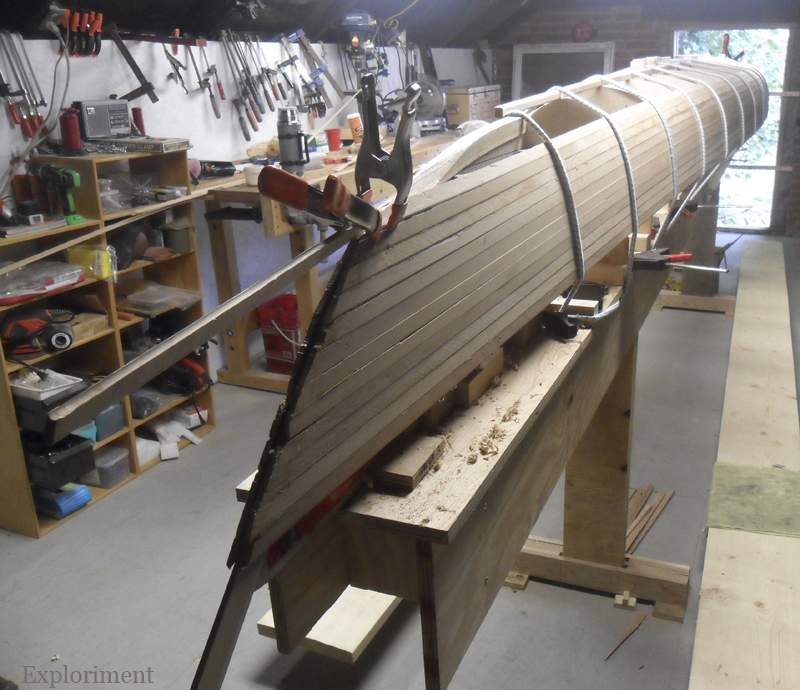
The problem is that after about the tenth board or so, they go from all vertical, to vertical at the bow and stern and horizontal in the center.
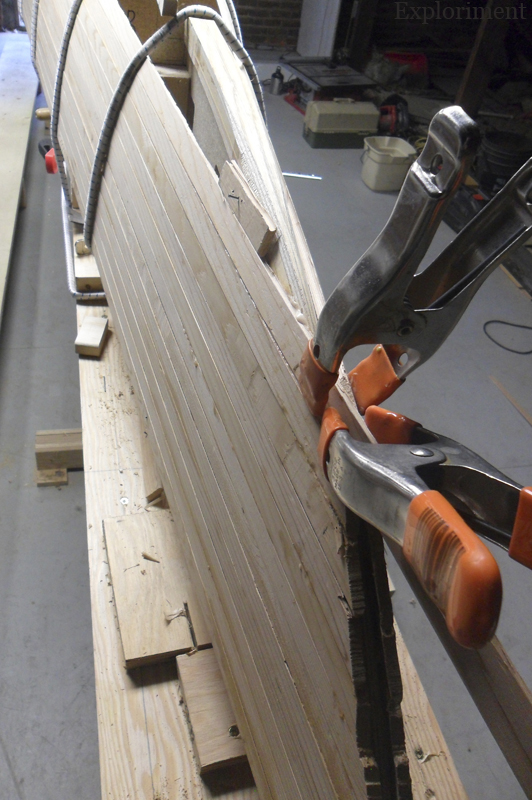
Here you can see some of the clamping (and shock cording) we had to do in order to counteract the torquing that happened with such drastic changes in direction. One thing that helped keep the vertical in place was to clamp a large bar clamp at the ends, the weight of which twisted it enough to seat the plank. Taking the time to hold the ends in place by hand waiting for the Gorilla Glue to take hold, helped as well. The first bunch went somewhat quickly, but these ones we really took our time on, to make sure the glue well and truly had set.
We put a batten in to help raise the shock cord so we could slide the next strip in without too much interference. We placed Tuck tape on the station molds to avoid getting glue on them, which would interfere with lifting it off the station molds.
Getting closer.
The other thing that is so tricky about it is that the cove on the strips is really fragile. We needed to be mindful of not crushing those delicate edges. We found that those same battens that we used to lift the shock cord up to allow easy sliding of the cedar strips, slid up against the plank, and then held in place with a clamp worked well. Lots of tension with no damage to the cove.
The bow, without the outer stem fitted. You can see that part of it has been sanded, and what a difference that makes. You can also see that some edges were damaged leaving slight gaps, and that a board didn’t seat properly as it dried, and left an ugly gap. It will have to be repaired with a saw dust and epoxy slurry.
The stern without the outer stem fitted. And a slightly better view of the contrast between sanded and unsanded.
The bow with the outer stem fitted. Most of the shaping has been done, with some more required at the top.
Hank had some lengths of half round bronze in the attic, and we decided to put it on the bow to help counter the inevitable collisions with rocks that are bound to happen. Here we’ve fitted it to the unshaped bow stem to see how far we need to shape the stem. After marking it was removed, and shaping commenced. It has polished up nicely from the look it has in this photo. While it will add some weight to the boat, I think the added protection in a high wear area will be worth it.
My view before closing the hatch at the end of the day. Sleep tight sweet kayak. See you in the morning.

Go here for part 6 of the build.

S.o.t.D. - Nothing Is Not Done – Flux

Nothing Is Not Done – Flux

I never paid much attention to Flux Of Pink Indians, because I wasn’t ever into that whole Crass punk thing. But when they transformed into Flux and got Adrian Sherwood to produce the album Uncarved Block, and got members of African Head Charge and Dub Syndicate to play on it, holy moly, did I sit up and take notice. Everything Sherwood touched became gold in my eyes, and this record was no exception.

Monday, 3 September 2012

S.o.t.D. - Belief (Mashed Mix) – Addiction

Belief (Mashed Mix) – Addiction

About a dozen years back I got a few CD compilations, devoted to a few different genres, usually several CD’s, put out by a company called Beechwood. I would find them used or in the remainder bin, so, a good price in other words. I didn’t realize it at first, but they would have a couple of known names, really good acts, and then a few acts I had never heard of before. The unknown acts were total filler. They would get a producer or two, that would make generic, by the numbers, cookie cutter tracks, give them some banal names, to fill out the handful of legitimate tracks.

This track was on one of those comps. It was an entirely unknown act (to me anyway), and if it was a filler track, it was actually really damn good. (Although the version here cuts out before the really great later half comes in.)

Bibliophilia: Simpsons Comics Meltdown by Matt Groening

Made me guffaw, just like the show.

Sunday, 2 September 2012

S.o.t.D. - Tokyo Dawn – Doc Scott

Tokyo Dawn – Doc Scott

Another of those tracks that perfectly combines pummeling drums, with really smooth melodic elements. Quintessential track from the whole liquid D&B genre.

Kayak Build pt. 4

The shear clamp and stems are fitted.

The shear clamps are what the hull and the deck are fitted to and what joins the two together. They are a bit tricky to do, since they are 7/8" by 3/4". When planing these to the correct dimensions, the worry lies in the fact that the two sizes are so close. For anyone contemplating tackling one of these, when you get to that stage, I would suggest you mark it to make sure you don’t make a mistake. Different coloured bingo dabbers or china pencils or some other distinguishing mark indicating which one is which. One corner also needs to have a rounded corner routered on to it.
Here just one side it fitted to make sure everything is all right.
Here both shear clamps are put in place. No stems as yet. The ends of the shear clamps at both the bow and stern need to be angled so that they come to an appropriate point.
Inner bow stem clamped in place and being roughly shaped with a belt sander. The tricky thing is that the stems need to be shaped, but it can really only be done as you move the strips up. It can’t really be done ahead of time. The shape is dictated by the strips. So it is done little by little as you move up. It’s especially tricky up towards the top.
A sense of the shape we’re aiming for.
And the inner stern stem clamped in place.
The shear clamps in place, covered in tape to avoid getting glue on them.
Shear clamp cut and angled so that it mates up with the stem, and glued.
Now the strips can be added and the hull formed.

Go here for part 5 of the build.

Thursday, 30 August 2012

Dustman!

Disorienting his opponents by blowing a snootful of sawdust into their face and following up with 2500 RPM of 80 grit sandpaper to the face.

S.o.t.D. - The Sign – Volor Flex

The Sign – Volor Flex

Ooooohhh that bass line....

Wednesday, 29 August 2012

S.o.t.D. - We’re Beat Now – Boral Kibil

We’re Beat Now – Boral Kibil

Soaring melodies and beats, and a smoking hot babe. Yes please.

Swiss Room Box

Being big into modular anything, and storage solutions in particular, I really like this a lot.
It allows you to transform a large number of automobiles into a versatile travel vehicle. It is storage, food prep and cooking, washing, and sleeping, combined into one elegant package. Yet it can be removed quite easily if the trunk space is needed for something else.

All I can say is I’m impressed and intrigued.
http://www.swissroombox.com/

Bibliophilia: The Last Days of American Crime by Rick Remender & Greg Tocchini

The Last Days of American Crime – Rick Remender & Greg Tocchini

Very dark, very violent - a heist story set in the near future, where the government is about to emit a signal that will make any citizen incapable of committing an act they know to be criminal. But just before this happens a crook is hell bent on one last heist that will set him up for life. He enlists a couple to help him. Good twist at the end. Loved the line “That walk tells the whole story. Every step an instant chapter. Its own language. On its own frequency.” 

Droids Don’t Cry

Love this homage to Star Wars/Norman Rockwell.

The artist, Mark Hammermeister also did this:
Both images can be purchased from his Etsy shop as a signed, numbered, limited edition 13x19 art print on acid-free art paper, for $30 USD.

Tuesday, 28 August 2012

Monday, 27 August 2012

S.o.t.D. - Kincajou – Banco De Gaia


Off the fantastic “Last Train to Lhasa.”

Artspiration – Samuel Silva

At first I was tempted to call shenanigans, and claim that it’s a photograph, but apparently this is done with ball point pens. Wow.


http://vianaarts.deviantart.com/

Kayak Build pt. 3

The forms go on the strongback. Pretty fiddly job. Making sure everything is level and straight and spaced properly, takes up a good chunk of time. But given how critical that is, unavoidable.

Hank was adamant that he didn’t want to use staples to construct the kayaks. One school of thought states to use staples to hold the strips in place. Run the glue into the groove, put on the next strip, and staple it on to the forms to hold them in place to dry. When it’s all done, you remove the staples. This leaves a fairly noticeable matrix of tiny holes. Even filled in with a slurry of epoxy and saw dust, they can be spotted. I’m not necessarily dead set against their use, but had to concede that the end result would probably look better without the staple holes. The cedar strip canoe that he built years ago he did without staples, and if he was familiar with doing without them, I would happily follow his lead.

There are a few different strategies you can use to achieve a staple-less build. Canadian Canoe in Mississauga peddles a pretty slick (although some might argue a bit pricey) kit. Hank put on his thinking cap and devised what I believe is a unique system. That works really damn well.
Some views of the forms on the strongback.
What Hank devised was a system of grooved blocks that could be positioned anywhere on the forms to increase or decrease tension, with the tension being provided by shock cord.
Screws in strategic places allowed the bungee cord to be criss-crossed around the entire strongback.
Plenty of extra bungee was left at either end. If an area needed some extra attention it could be wrapped around and clamped in place. Depending on the need, the whole system could be removed or shifted without a whole lot of drama.

This system will here to fore be known as the “Nyhof Clampage System.” I decree it.
On a project like this, clamps are indispensable. (And you can also see another indispensable item in the third picture, Ted Moores’ Kayakcraft.)

Go here for part 4 of the build.