skip to main |
skip to sidebar
Kayak Build pt. 12
Finishing the insides.
Planing off some of the excess wood along the deck.
Deck on the floor on the right, molds still attached.
Amusing to see all the debris on the inside. Shaving from spokeshaving it, dust from sanding, globs of glue and epoxy, and pieces of wood we used when clamping to avoid damaging the coved edges on the strips. Quite a few would would fall inside spaces with openings too small to get a hand inside to retrieve them.
Sanding the inside. Pain in the ass. Sanding in general is a pain in the ass, but trying to get into those ends was particularly tricky.
The grey thing was a fan Hank had that helped blow some of the dust out towards the window.
After a day of sanding. Good enough.
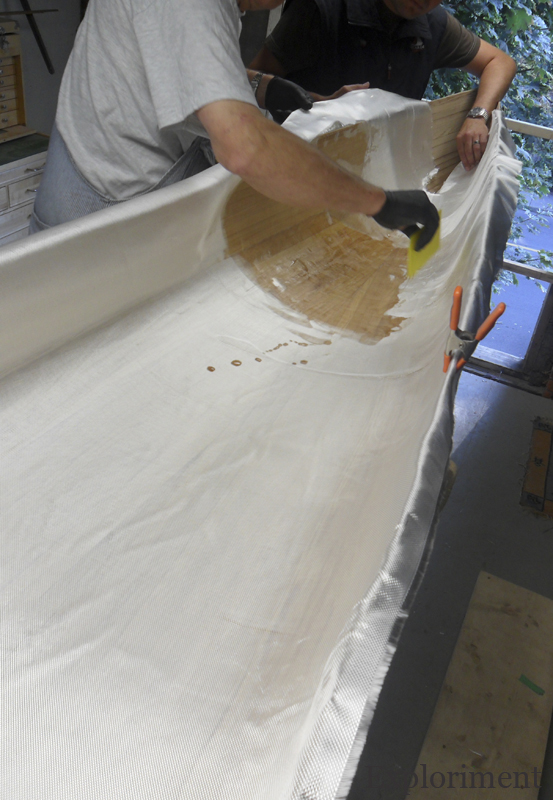
Ahh fiberglassing. Amazing how a material so flimsy and fragile, once impregnated with goopy epoxy, becomes a rock hard strata that holds the whole thing together and gives it virtually all of its strength.
If sanding the ends was tricky, getting them fiberglassed was no more fun.
We put some extra epoxy in the cockpit area.
The cradles for the hull.....
....replaced with the cradles for the upside down deck.
The deck, with globs of glue and epoxy everywhere.
After spending hours carefully smoothing the top of the deck with a spokeshave, seeing it in a very rough state was amusing.
Sanded. Given that this wouldn’t be seen, we didn’t go hog wild here. Just so long as it was smooth enough to allow the fiberglass and epoxy to adhere was fine.
After putting a fillet in along the edge to allow for a smooth transition from horizontal to vertical, some more fiberglass and epoxying.
Fiberglass and a layer of epoxy....
...and a second layer of epoxy. Once again, didn’t go too crazy sanding this. Just smooth enough to not damage any gear in the holds or rip my legs open in the cockpit. Functional not pretty.
I may not be the most impartial judge, but damn that is sexy.
Go here for part 13 of the build - cutting out the holes for the cockpit and cargo hatches, cockpit combing and a lip for the hatches.


I still cannot believe how awesome that looks. Good job, Thomas! Good job!
ReplyDeletePositively stunning!
ReplyDelete