So the wallet that I had for a bunch of years, one from Asolo, had gotten to a point where I thought a change was in order. I liked the basic design just fine, and had gotten used to the layout. My problem with it was that the material had started wearing through in places, the zipper on the change container had busted and several attempts to repair it had proven futile, and the Velcro that closed it had given up the ghost long ago. Of course. Since the change container no longer closed, I had been using some solutions of my own, both the SmackSack and the Change’mups. The latter I liked a lot, but it meant that I had two items to deal with in two separate spots. Wanted to have bills and change in one spot.
I could have gone out and bought a wallet, but there is no fun in that.
Thought it over for quite a while. Thought of different features, different closure options, how to deal with the change compartment. This is what I went with.
A friend had given me a pack a while ago that I had taken apart for some of the material and webbing and hardware. The Cordura was purple, and since that is a colour I am fond of, and a nice change from the usual black or earth tones I work in, opted to make the wallet from it.
The one thing I did that didn't work in my favour was doubling the fabric. It originally had a waterproof coating that over the years had rubbed off and consequently looked a bit scuzzy. Decided to put it back to back to avoid seeing that. Which made for too much fabric. Dummy.


I used a different construction method than I would normally use, where I make it inside out and when it’s turned, all my ugly stitches are hidden inside. Here my ugly stitches are visible.


I liked the design of the Change’mups a lot. I though of putting it on the other side, tucked in beside the retaining flap, and a clear window for ID on this side, but went with this instead.


Instead of guaranteed to be useless in 6 months Velcro, I opted to use snap studs instead.
Went with a bit of contrast by adding some grey here and there. Like those two colours in combination.


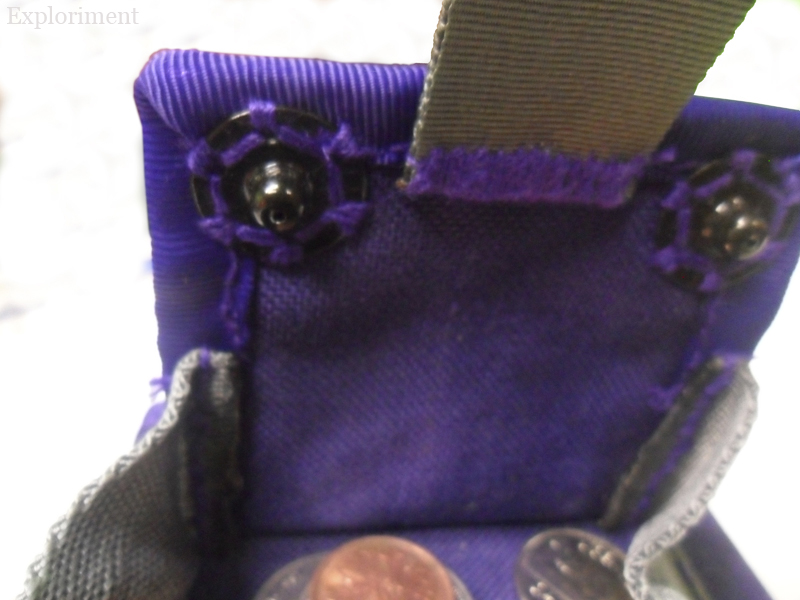
And here I also went with snap studs instead of Velcro.

Underneath the snaps I put a reinforcement of some webbing. Given how often they will be opened and closed, I wanted to do something to lessen the strain that will be put on the thread and the fabric.


550 loops on both sides so that I could attach retention lanyards or hang it around my neck if I wanted.


I can tuck away a miscellany of coupons, bus tickets, business cards, bank books, sentimental photos, etc. I put my library card in the bottom slot and went with a clear window so I can easily scan my card when I sign books out (which I do rather a lot) without having to remove the card from a slot.


Keven at the sail loft gave me some old Spectra line. (It’s probably still fine, but if you’re spending thousands on a sail, you may as well spend a few tens extra on cordage.) Its grey colour worked perfectly with the colour scheme. I tried to do a roundish snake knot, but its thinness and the length of the cord I had to pull through made that a pain in the butt. Opted for a cobra knot, and when I had lots left over went around again for a king cobra knot.


Tethered to the pouch on the Messenge’mups that I carry the wallet in. Prevents loss or snatching.
So all that excess fabric has made it possibly the most rugged wallet ever, and filled up with cards and cash and change, it is a hefty package. Think I will go out at some point and get some new fabric and try it again. But, it works.
Oh and I sewed it by hand. Took me about two weeks. A few hours here, an hour there, a couple of hours there. Not as pretty as I’d like, but it’s strong.


Looks very good. Well done.
ReplyDeleteNice color to.
Coolness!
ReplyDelete