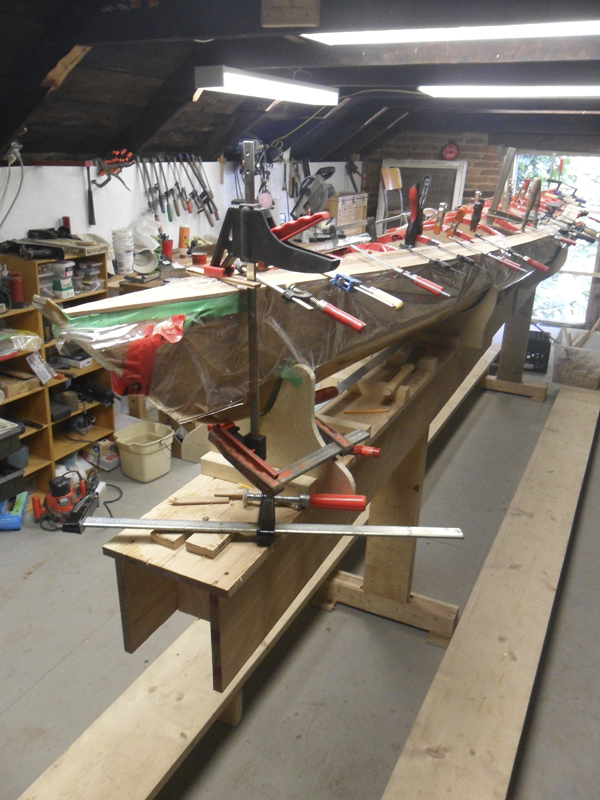
Planking the deck.


Kayak turned over. Shear clamps visible that the deck will be attached to. The plastic was put in place to prevent glue and eventually epoxy from pissing down the side of the hull. The tuck tape was put on the forms to prevent the glue from joining the wood from sticking to them.


It begins. A sight that was to repeat it self many times, a profusion of clamps sticking every which way.


Two strips of white cedar and then an accent strip of walnut. At various stages in the process the strips wanted to sit too proud for our liking, so we put a clamp atop them to press it down.
Another example. Because there is not a single straight line anywhere on the boat, trying to keep the clamp in place proved difficult, so we had to put one on to hold down the strip that jutted up, and then another clamp to hold that clamp in place so it didn’t slide off.

A view without all the visual interference of the clamps, showing the contrast between the white cedar and the walnut.


The walnut came from a pile of it that Hank had had sitting around for decades. Decided to use a little bit of it for some contrast. Besides the strips along the sides, we also chose to use it for the king plank running down the center of the deck. Since none of the walnut was long enough we scarfed two shorter pieces together.


Took a while to get the king plank perfectly straight. We drove brads in to the forms on either side make sure it was perfectly lined up.


We were given a stack of red cedar that a friend had used back in the early 80s to make some canoes. It had sat in his barn for all this time, and he gave it to us to use. We opted to use it for the remainder of the deck.


Another view without the interference of the clamps.

The contrast between the three types of wood.


Another creative effort to make the strips conform to our will.


Coming along. I read James Raffan’s book Bark, Skin and Cedar during this time. In it he talks about how many indigenous societies that employed canoes and dugouts, the canoe figures prominently in their creation myths. Since they may well have arrived at a place in their boats, this makes sense. Their birth into a world so to speak came via this vessel. But it’s shape also suggests another means of giving birth. It was driven home especially at this stage.

Things look relatively smooth here, but that is only because I spokeshaved all the rough, raised parts down.


Love spokeshaving.

Going to start a side business in high end hamster bedding.


Getting closer.


Almost there. Since the open part is right where the cockpit will be, we didn’t get too worked up about trying to finick little pieces into that gap. Just not worth the work it would take.


If I may be so bold....holy hell that thing is sexy! All right the plastic skirting looks a little tatty at the moment, but that will go away soon enough.


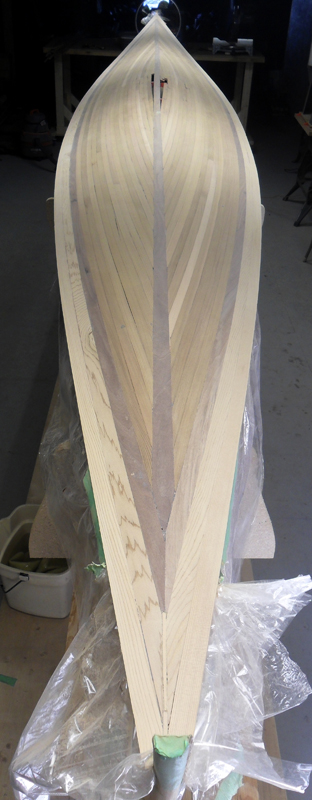
Another view of the top. One inadvertent occurrence was that the red cedar we used was old. We were told some of it was purchased in the late 70s, and as more canoes were built over the years more was bought, and what we got was a mix of all of it that had been purchased over about 5 years. Since it was so old, it had a pretty good patina on it. What looked quite dark when it was put on, when it was spokeshaved, lo and behold, it proved to actually be somewhat yellowish. The two planks in question, you can see the colour change as it progresses. Not planned, and it makes for a much lighter spot, one on each side/end, but by that poiint there was nothing I could do about it.


Filling up any cracks and gaps with an epoxy/sawdust mix.


Sanding. Spokeshaving produces lovely smelling curls of wood. Sanding produces a pernicious, carcinogenic dust. Ugh.

After sanding. The two conspicuous discoloured strips are a little more prominent now, but whatever.


Creamy!


No comments:
Post a Comment