Showing posts with label freezer bag cooking. Show all posts

Saturday, 26 June 2010

MSR Titan Kettle

I wish there was a way to deduce the ultimate gear set up just from looking at a picture in a catalogue, buy it and be done with it. Alas, it often takes some trial and error to get the perfect setup dialed in.

Cooking setups being a case in point.

I’ve made a whole bunch of alcohol and wood burning stoves, wind screens, pot stands, I’ve tried a few different multi-fuel and canister stoves, a variety of pots, etc. I have a BushBuddy, and a Caldera Cone. They all have their good points, they all service a niche, but alas they also all have their own drawbacks.

Besides striving to reduce the weight of what I’m lugging about, I also want to reduce the size of what goes in my pack.
I’ve been the very happy owner of an MSR Titan Kettle for a few years now. Of all vessels I have to boil or cook in, it’s by far my favourite. The handles don’t flap around or clang, the lid stays on securely, there is a pour spout, the handle on the lid can lie flat for storage but be secured upright when in use to make removing it easier, the size is just right for one or maybe two people, there is a tiny hole in the lid to serve as a whistle to let you know the water has boiled (I could do without that feature personally), it’s made out of titanium, which is always cool.
I decided to put together a cook set that was completely contained within the Titan Kettle.
Now this was my first stab at it.

About the only thing that I made specifically for this was a wind screen.
I needed one that would fit perfectly within the kettle, so I utilized a printing plate. I’ve used many things to make wind screens. A disposable aluminum baking tray liner is very easy to work (scissors and a hole punch will work), but probably won’t survive for a really long time. I’ve also used tooling foil. Easy to work and has held up very well. Some people use roofing flash, which is very sturdy, but heavy and more difficult to cut and drill. Here I decided to experiment with printing plates. Flexible, yet a bit stiffer than some other stuff I’ve used and still easy to work. And for me, they’re easy to acquire and free.
I decided to try one without the usually recommended air holes at the bottom. Just for the heck of it. If it didn’t work, it’s not a big deal to add some holes. I made two others at the same time with two different vent hole arrangements. I’m not sure how well printing plates will hold up long term. The look of the discoloration I’m fine with. But after a quick trial session they felt a bit weakened in the discoloured areas. I don’t know if the chemicals the plates are coated with have anything to do with it. But that’s all part of the experiment. Try things out, see what works, see what doesn’t. Gives me an excuse to get out for a hike. Not that I really need one.
I cut all three wind screens to the length that I did so that I could either close it around the opened handles...
...or with the handles folded in.
I played around with a few different stoves. (I have dozens to choose from.) Due to it’s small size, I had to try the Gram Weenie Stove. (The instructions to make it if you’re crafty. The place to buy it if you’re not.)
Great little stove – light, small, efficient – but its small size makes it suitable more for a very narrow pot like the Snow Peak Mini Solo. With a slightly wider pot like the Titan Kettle, it’s a bit too wobbly for my liking.
As I mentioned I have made loads of alcohol stoves. One of the ones I like the most, and was absolutely the easiest to make was the (what is alternately known as a) FancyFeast or SuperCat. It takes up a bit more room in the kettle, but I think this is the one I will go with.

Both of these stoves serve as their own pot rests, due to the jets being on the sides of the stove. A stove design that has the jets on the top requires a separate pot stand of some sort. Not a big deal, but I thought I would like to try and avoid that as it just means more stuff in the kettle.

Some stoves require measuring, cutting, sawing, drilling, shaping, gluing, riveting, etc. This one can be made by an all thumbs on two left hands klutz. A cat food can and a hole punch is all that is required. And it works really well.
Add alcohol to the stove (you become very good after a while at knowing exactly how much is required for boiling given amounts of water), put a little bit in the primer pan under the stove, light it and in a moment the alcohol in the stove lights. 
The weird thing about alcohol is that in daylight it’s not easy to tell if it’s burning or not. The flames are invisible. Most often it does light, but there are times when it doesn’t. Today I could see vapours on the rock, and sometimes you can see bubbles form and pop in the alcohol, or hear a slight hissing sound. I usually do a quick pass a few inches over the stove with a finger to feel the heat.
Center the windscreen around the stove...
...center the pot on top of the stove...
....and put the lid on. Or you can put the lid on the pot, make sure it’s square on the stove and drop the wind screen around it. :-) The lid clicks on to the pot fairly securely. Since all I ever really do with this is boil water, that’s fine with me. If someone were to actually cook something in there, and need to stir often, they might want to just rest the lid on top like I did in the photo. 

Oh and a hint about titanium pots. Make sure you put the water in before you put it on the flame, otherwise you’ll get a crazy anodized pattern in the bottom of it. Ask me how I know. 

I tried various approaches to what could all be fit inside the kettle, and one of the things that fits fairly well is a Guyot Designs Squishy Bowl.
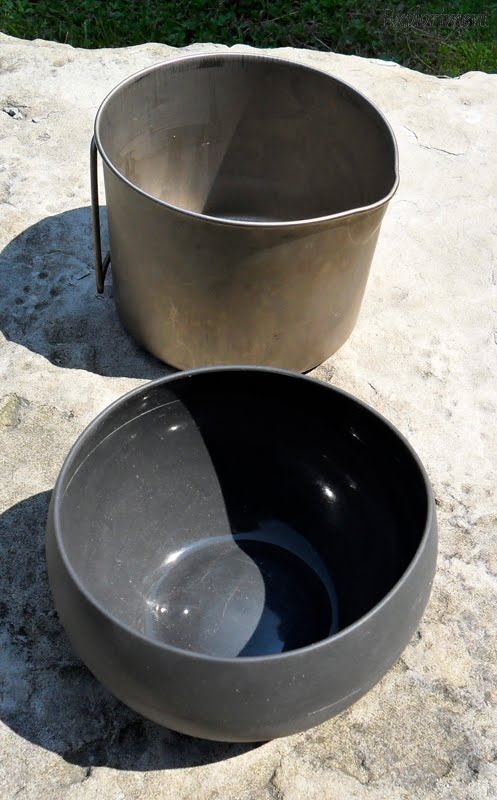
Unfortunately it made getting everything else I needed to get in there very tough. Bummer, since its size made it a pretty versatile item.
This is what the set up is now.
A bandana to grab the handles with, wipe the kettle after use, etc., etc. A big part of what it does though is stop everything inside from rattling around.
A Fold-A-Cup, which you can see in more detail here.
Bic lighter, two fuel bottles, stove, primer tray. (Here you can really see what putting an empty pot on a flame does to the titanium. Whoops.)
Spent quite a bit of time trying to figure out what bottle would serve best to hold the alcohol. Found that Purell hand sanitizer bottles were the right height (or length once you lay them on their side) to fit in the kettle, and the fact that they’re rectangular-ish makes them more packable. This is enough fuel for two days. Now I just need to put some of these warning labels on them.

I suspect I might do a bit of tweaking to it yet, maybe cut down a spoon to fit in there, but by and large it’s how I want it. I wish I could have a bigger cup, but what I have will suffice. It’s going to take a bit of testing over time to see how durable those printing plate wind screens are. Maybe they’ll be just fine, and maybe I’ll have to swap them out with screens made from something else.

This makes for a nicely compact cooking system. Certainly as compared to the Caldera Cone or BushBuddy. I like each of those systems and they each have their place, and serve a niche. The Caldera Cone I will likely keep for canoe trips or trips in a vehicle where weight and room aren’t as much of an issue, and the BushBuddy is great for cold temperatures or extended duration trips. But for a lot of what I do, which is day trips to three day hikes and hang’mups, where I want to keep my pack size and weight down, this is a pretty ideal set up.

The other thing that’s great about this set up is that it fits perfectly inside the Camozy

Since it all works in conjunction anyway, it makes sense to keep it all together.

Oh and the weight of the whole set up as you see it there, with the cozy, is 430 grams.

Monday, 26 April 2010

Ration Packs


While in principle the idea of an MRE or an IMP is great (everything you need for one day in one package), the few I’ve had the chance to try have been soso at best. Some of the individual components I don’t really like, and quite often the meals taste more like preservatives than real food. I guess they’ve been getting better and more diversified over the years, but the ones I’ve tried haven’t been that thrilling. (Maybe that’s why they’ve gotten all sorts of pejorative nicknames over the years. Materials Resembling Edibles, Meals Rarely Edible, Meals Rejected by Ethiopians, Meals Requiring Enemas, Meals Refusing to Excrete, or Massive Rectal Expulsions.) The other thing about them is that they produce a lot of garbage and they also contain all the moisture in the meals, making them a bit heavier.
 
What I did do though was to take the idea of all the food for one day in a package and make my own versions.

I’ve tried various freeze dried meals, and while some are great, some of them are just awful. I’d love to try them all out to see which ones are good and bad, but given their price, that becomes problematic. Their sizing is often a bit wonky too, as I find they’re a bit too big for one meal, and not really enough for two people. Making my own by preparing a meal and then dehydrating it, allows me to more accurately measure out a portion that suits me. 

I can control the calories, the salt, the fat, the portion, the taste. On a winter trip I might want to have more calories or fat, but on a hike on a hot and humid summer day, not so much. Making my own meals, allows me to set them up exactly as I like them. And if you’re making meals with stuff you grew or foraged or hunted – even better!

(Although in these photos I have a meal from MaryJanesFarms. I bought a whole bunch of them at one point, and I’m just using up the last of them. Of all the ones I’ve tried, these have been my favourites. As much as I like them, I doubt I’ll buy any in future since I’m committed to making my own, but if you’re so inclined, they’re good.) 

I have at least a week of these ready to go, and try to have at least two weeks ready to go. The older ones are at the front of a RubberMaid bin and I can grab them, stuff them in my pack and be off. I use these often enough that they rotate out fairly quickly, so expiry isn’t such a big deal. The only thing I’ve ever had go bad in them was some commercial beef jerky. The stuff I’ve made myself has been fine though. 
Each bag contains breakfast (in a freezer bag), hot drinks – my own hot chocolate mix (way better than any of that commercial hot chocolate mix) or tea with sugar packets), snacks, dinner, dessert.
  1. Bison Pemmican
  2. Cashew Larabar
  3. PC Fruit&Nut Mixed Berry & Almond Granola Bar
  4. Vector Chocolate Chip Bar
  5. PC Fruit&Nut Apple & Almond Granola Bar
  6. Clif Oatmeal & Raisin Bar
  7. MaryJanesFarm Curried Lentil Bisque
  8. Beef Jerky
  9. Vanilla Pudding (pudding powder and milk powder)
  10. Schuttelaars Salmiak Brokken (Dutch liquorice candies)
  11. Fruit & Nut Couscous
  12. Hot Cocoa (milk powder, real dutch cocoa, maple sugar)
  13. Tissue Packet w/ Antiseptic Wipes
  14. Fruit Leather
  15. Mixed Nuts
  16. Vegetable Curry
  17. Vega Food Supplement
  18. Multi Vitamin
Now, MREs have a fancy heater bag - you put the meal in the bag, add some water, close it up, some mad science exo-thermic reaction takes place and it heats up your meal. I just use one of the stoves I’ve made, boil up some water and add it to the meal.

In the morning I take out a bag, get out the stuff for breakfast, boil water, pour it in the bag, put it in the cozy, make hot chocolate, fill a thermos with hot water, and put the days snacks in the cargo pockets of my pants (all I ever use them for). I set off after drinking the hot chocolate. An hour or two later I stop and have the breakfast. I eat the snacks as the day progresses. I may stop at lunch time and use the hot water in the thermos to make some tea or prepare a soup if it’s cold. At dinner time the meal is prepared by adding hot water to the freezer bag and put in the cozy and allowed to simmer for a while. Sometimes I’ll have pudding that I prepare with cold water in a bag and leave for a time in a stream or a lake to have for dessert. While that is happening, a bit of exploration, hammock set up, photography, whatever can be done. Later, the food is eaten, usually another yummy hot chocolate is drank, the garbage is packed in the large zip loc bag. While this obviously still produces garbage, it isn’t as much as the MREs produce, and the ziploc bags can be rinsed out and used for something else if need be.

Thursday, 1 April 2010

Mess Kit Revisited, pt. 1

When I was a kid I got a Canadian army (although it’s used by others as well) rectangular mess tin set. In addition I also had a nestling knife, fork, spoon set, also Canuckistani issue. The mess tin, due to its rectangular shape packed fairly well. In order to boil water, the larger one could be placed atop the smaller one to act as a lid. But really, it always seemed to me that it was best for troops that had access to a field kitchen, where a serving could be slopped into the tin.

A few years back I got the Light My Fire Mess Kit. A fun new take on an old idea. Terrific product design by Joachim Nordwall. The spork is an especially great feature of the set.
The triangular shape is a distinctive feature and yet also a drawback.

The size is 19 cm (7½") by 19 cm (7½") by 19 cm (7½") by 6 cm (2¼"). The weight is 330 grams (11.74 oz.)
The set consists of two plate/bowls (a deep and a shallow), the aforementioned spork, a cutting board/strainer, a covered cup, and a small water tight bowl/container.
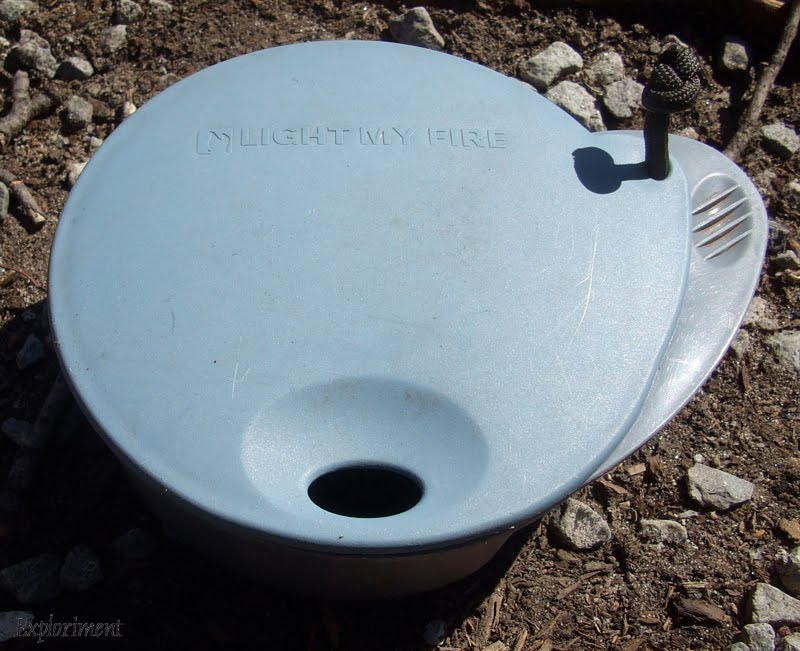
Let’s start with the cup. Equipped with a lid to help keep the contents warm. The lid has a small hole to drink from. On the side is a protrusion to help hold the cup.
Originally the cup’s lid was tethered to the cup by a loop of what I think was Spectra cord, held together by a zipper pull clasp. The loop was big enough to slip over my hand. Too much in my opinion, so I replaced it with a short bit of 550 cord.
One feature I thought was really elegant are the 100 ml. measurement indicators. Very slick. 
One feature I didn’t like at all was the branding embossed into the bottom of the cup. Keep that on the outside of the cup. Those tiny little grooves are really hard to try and clean out in the bush, and that can lead to bacteria buildup and consequent health problems.
Inside the cup is a small, cup/bowl/storage container. While it could certainly be used to drink or eat from, I think its main purpose is to serve as a water tight container to store things like tea and sugar.
The spork is the other stand out design from this set. Unlike most spork designs, which don’t really excel at either role, this one is a good spoon and a good fork. Not to mention that it also has a serviceable…cutting (more like hacking) feature on the side of the fork. It is breakable though. I carried this in another setup and just from getting jostled around it snapped in half. It also doesn’t float. Ask me how I know. And like the bottom of the cup, this also has their logo embossed into it. I understand that companies want to get their name all over their products. But crud just gets trapped in there, and in an outdoor environment, there may not be the chance to clean it as thoroughly as it needs to be cleaned. They need to find a way to brand their product without creating a germ trap.

Light My Fire has come out with a titanium spork. This should counter the breakability issue. And seeing that I’m member #23 of the Titaniacs Guild, I need to get one just cause it’s titanium.

I think this is a great setup for an urban, use it at work, or go on a picnic set up. For me personally, I strive for a pretty minimalist setup out in the bush. Both for the sake of simplicity and weight, but also for packability. To me the drawback of the set, at least from a backpacking perspective is that the triangular shape doesn’t pack so well. I suspect the shape may have had more to do with creating something unique to differentiate itself in the market. Fair enough, and I’d say they have succeeded. And certainly, it’s very usable from a simple eating perspective. But like I said, in backpack, where every square centimeter is a valuable commodity, it’s not really an optimal shape. Not to mention that it’s a bit more than I really need. I have gotten completely into freezer bag cooking. I’ll eat right out of the bag, so two serving vessels are unnecessary. The cutting board/strainer is really elegant, but just not something I really see myself using much. The little storage container is nice, but not really critical for me. The cup is the clear winner in the set. Good size, and great to drink from. And when I get the titanium spork, it will be a great addition to my stuff.

Being a design junkie, I really appreciate the styling of it. But there are features of it that lead me to think that form took precedence over function in some aspects.

I have put this mess kit in my urban bag on a bunch of occasions, and used it at work, picnics, cookouts, whatever. Other people may well find it ideal for their style of camping. For me, doing long distances at a brisk pace, and stealth camping when I get to where I’m going, it’s more than I need. But the cup is a keeper for me.

Part 2 of this series, can be found here.