Showing posts with label kayak building. Show all posts

Monday, 30 December 2013

Kayak Update

Things have been quiet on the kayak front lately - wait for it, money issues - but the ball is rolling again. Although there will be another interruption as a 15 foot canoe will be built. That will occupy the strongback for a while. No matter, since there won’t be any kayaking for a few months anyway.

She has had the foot pegs installed, been varnished, the deck mounted and attached, ash rub rails attached.


The bronze stem band went on shortly after this picture was taken. And then the battery in my camera conked out. All that remains to be done is the hatches need to have a weather proof seal put on, blocks need to be placed on the deck for webbing and bunjee attachment and a seat put in. Oh and some Spectra line installed as carry handles. And I think that will be about it.
This is the back end.
And this is the front end.

Friday, 12 April 2013

Belcher Islands Kayak Frame

Nice article on building an Inuit kayak - as much as possible as they might have. Driftwood, hide for connections, hand tools.
http://capefalconkayak.com/belcher.html
The rest of the site I am really digging as well.

Tuesday, 4 December 2012

Bibliophilia: Kayaks, Kayaks and more Kayaks

Given my recent activities, I got my mitts on every book I could find on the subject of building canoes and kayaks. The Building and Repairing Canoes and Kayaks I found the least useful of the bunch because of the age of publication and since it deals exclusively with building fiberglass boats. Not what I was involved in, and the other books dealt with the matter as it pertained to strip building better anyway. Building a Strip Canoe is very nice, especially the included plans. If building a canoe, I would recommend that particular book. The Modern Canoe is another one that I gleaned some hints from, and also recommended to anyone building a canoe. Wood and Canvas Kayak Building is interesting, but since it was a different construction technique, I didn’t read it in any intense depth. I’ll read it again at a later date I’m sure, but given time constraints right now, I needed to focus only on stuff relevant to the kind of boat I was building. Kayaks You Can Build was very good, but dealt more with stitch and glue plywood construction. A technique I would love to tackle soon, but not what I was working on right now, so it got only a cursory read. KayakCraft was by far the most helpful, since it dealt with kayaks specifically, and also because it ties in with the plans we used. This and his other book on strip building a canoe are the books on the subject. Lots of photos and diagrams, and the text I found straight forward and helped me get a good grip on the whole process.
Woman’s Guide to Sea Kayaking – Shelley Johnson

Then after reading everything I could about making them, I wanted to read everything about paddling them, handling them, rolling them, tripping in them, etc. Lots of experience in canoes, none in a kayak. Not for lack of desire, just lack of opportunity. I don’t think the Woman’s Guide to Sea Kayaking has that much gender differentiation other than the title. Women and this man can (and did) learn stuff from it. Kuhne’s book was fairly bare bones; some good info in it, but the presentation was marginal. Certainly compared to the presentation in Paddle Your Own Kayak. Lots of beautiful colour photos, and touched on everything you could want to know about the topic. If I was to recommend only one, the McGuffin’s book wins hands down.
Paddling And Hiking The Georgian Bay Coast – Kas Stone 
Then I wanted to read about going specific places in them. Kayaks don’t really lend themselves to woodland lake hopping so much. But they do lend themselves to open water island hopping. Given there are tens of thousands of islands in Georgian Bay, this is an area ideally suited to the craft. I thought both were equally good. The maps are very rudimentary, but they’re meant to be coupled with  real maps - topos and sailing charts.

Monday, 26 November 2012

Kayak Build pt. 14

Taking her out for a test spin.

Now that the kayak was close-ish to being sea worthy, we wanted to take her out for a quick test paddle. It won’t be fully completed for a while yet, and I didn’t want to wait until next spring to try her out. And the other thing we wanted to see is: do they work for us. Meaning, we chose this design for two big boys to use. Before we go ahead and build a second one, shouldn’t we see that they indeed fit us. Can we get our selves into the cockpit okay, do our legs fit, do our feet fit? I was reasonably sure they would, but for the heck of it, we arranged with Dag to come down on a Sunday afternoon and we walked her down to the water and gave her a quick test spin. 

And another thing is that I have never been in a kayak. Canoes many times, although my experience with soloing them is limited. So I really wanted to get into one and see what it was all about. I was a little bit nervous, but more than anything I was very excited.
When I got there, Hank had shuffled the strongback with the kayak on it over to the side so we would have room to put it on the floor before lowering it out of the window. To offer a little protection from damaging the still unfinished sides, and also to hold the totally unfinished hatches in place, he had applied tuck tape.
Ready for launch.
A few months ago we shoved big honking planks of wood up through the attic window. Now we were lowering what we had made form those planks down from the attic window.
Off we go.
In the water for the first time. Hopefully the first of many, many, many times she is lowered into the water. I opted to wear my wetsuit pants and paddling booties, in case something bad happened and someone had to go in after it. Unlikely, but you never know. Oh and I was also a responsible paddler and wore my PFD.

Getting in was a little freaky, just because it’s an unfamiliar craft, and a sensation I need to get used to. But once I was in...wow. Very different than a canoe, just because I’m pretty much in the water, rather than sitting a foot above it like in a canoe. 

Okay, I’m in this thing, I haven’t flipped over, hung up inside it, drowning...okay. This is cool. Oh I’m liking this sensation.
Foolishly we had put it in the wrong way around, with the stern towards the open water, so I had to get a long, very fast boat turned around in a small space. Not being used to the length or speed of it was a bit awkward, and I had never used a double bladed paddle either, but within a minute or so I had the hang of it. Played around a little getting a handle on handling it
All right, enough goofing off, let’s take it out into open water. Hank had a wooden paddle up in the attic rafters taht I used, but it is really too short for me. I need to carve some paddles over the winter.
Like I said, an almost 20 foot long kayak is fast. And that sensation of gliding on the water....WOW!
The freakiest part of the whole exercise was getting a grip on how far that bow jutted out in front of me and easy it was for that long boat to move almost effortlessly with one stroke of the paddle and how quickly that would move me towards the dock. I bumped into the dock a few times. Whoops.
Then it was Dag’s turn to give her a whirl.
Being a very experienced paddler (not to mention an Olympic level sailor) he made it turn with no effort at all.
And off he goes.
And he was also very happy with the way it handled. Both of us fit inside of it just fine. And may I just say...damn that kayak looks nice. Those lines are something else.
And no! I didn’t pee myself. With no seats inside of it, the water dripped off the paddle and collected right under my ass.

And then, sadly, we brought it back inside, and hung it up in the rafters to begin the next boat. Lots of fiddly things left to do (bulkheads, hatches, foot braces, seats, stem band, gluing it together, putting on the rub rail, varnishing it), but they will be done over the coming months.

I could have paddled that thing for a few more hours.

Wednesday, 14 November 2012

Kayak Build pt. 13

Cutting out the cockpit, hatches, and adding the cockpit combing.

I guess there are a number of ways we could have tackled the cockpit and the combing, but we decided to use all the little scraps of wood we had left over.
With a marker we drew out where the cockpit was, covered that with plastic to avoid the glue sticking to the deck, and replaced the shockcord.
Gorilla Glued the pieces in place, taped them and held them in place with the shockcord.
This only shows one layer, but we built up two layers of cedar strips. Since the glue was good only to hold it in place, we also fiberglassed and epoxied this for strength.
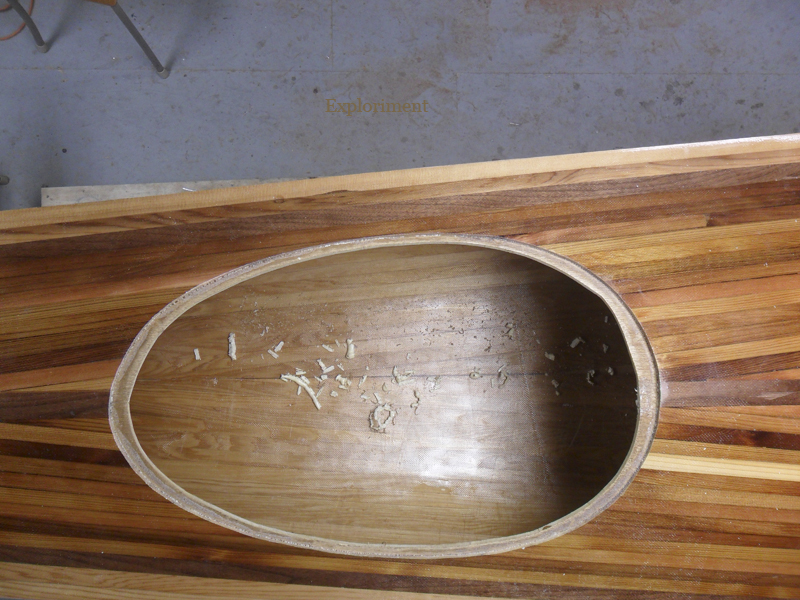
There were a number of ways to go about cutting out the cockpit, and we decided to try the plunge router we had sitting around. Since we knew there would have to be some shaping, and since the shape of the hole wasn’t super critical, it worked okay.
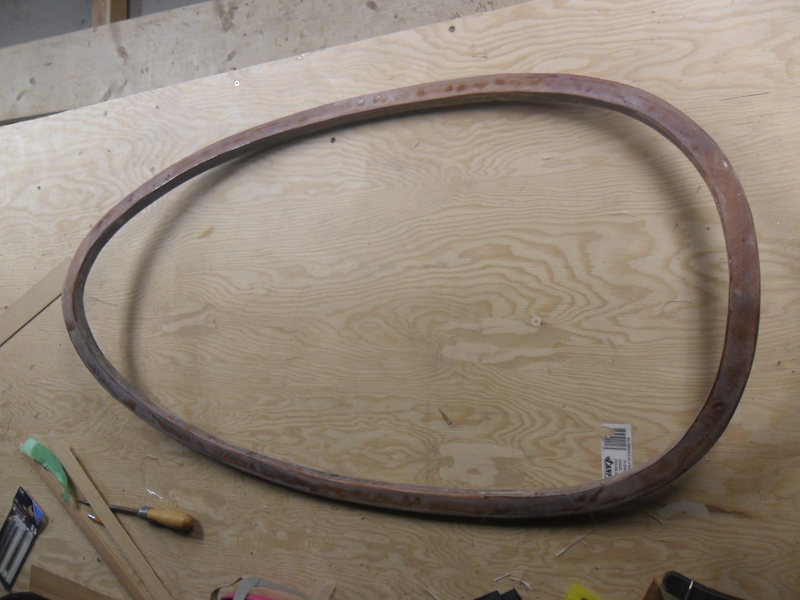
If we’d gone to the trouble to completely finish the strips off, I might have gotten a servicable riot shield out of it, but instead I ended up with a hunk of scrap.

After this we did a not too scientific weigh of it, and it came out to around 50 to 55 lbs. Which given the cockpit combing to go on, bulkheads, seat, foot pegs and rub rail still to go on, means that KayakCrafts claim that it will come out to about 65 lbs seem quite accurate. 

The other thing that struck us was that all the wood we handled at the start of this project, was much, much heavier than 50ish pounds. Remarkable how much weight disappeared as saw dust, planer chips, spokeshave curls and sander dust.
The combing, with the centre cut out, and the outsides roughly shaped.
The combing clamped in place to allow the two elements to be sanded and shaped so they were more or less perfectly matched.
And the outside of the combing shaped.

The lip on the combing is another thing that could have been tackled in a few different ways.
We opted to use some mahogany that we found in the rafters and planed very thin. This was the first layer. (While wood dust of any kind isn’t so fun, the instant we started planing and sanding this stuff, there was an almost instant bitter taste in my mouth, even with a dust mask on. Freaky.)
The second layer. All clamps on deck!
A view without all the clamps.

Now came cutting out the two hatches. The cockpit was a little less hairy, because I knew we had little more leeway. On the hatches however, I knew I only had one shot. I also wanted the thinnest kerf possible.
What I opted to use. I had originally contemplated a Japanese key hole saw, but still felt the kerf would have been too thick. An X-Acto handle and a junior hacksaw blade with the pin popped out of the ends is what I ended up using. With a handdrill and a bit about as thick as the blade, I painstakingly drilled a row of holes, just enough to work the blade in.
Some deep breaths.....and begin. I put down tape to mark where the hole was, because shitty Sharpie markers just wipe off with the slightest contact.
Took me about an hour to do a hatch.
Almost there.....
Through. Very happy with the results. Perfect cuts.
I sort of knew it would, but I wanted to see if my beloved Kifaru pack frame would fit through the hatches. And indeed they do. Given the direction my hole packing system is moving towards, I wanted to have the option of carrying this if I wanted to. I can see instances where this will not be carried, but I like having the option.
Next step was adding some lips under the hatches. A scrap of marine plywood Hank had kicking around was used for this. Cut to shape, not perfect, but close enough.
The forest of clamps once again. I’m about to scrounge up a few more clamps to fill in the empty spots
The Gorilla Glue (made from the essence of pure gorilla) foaming up.
The other hatch and the kooky number of clamps needed to bend the wood and hold it in place.
Without the clamps and the scraped off Gorilla Glue littering the bottom.
And with a coat or two of epoxy.
Tomorrow the cockpit combing goes on.
Didn’t get any pics between strips of unfinished mahogany and now, but here it is shaped and sanded, fiberglassed and epoxied. The nutty thing is that this took about as much time as the deck itself. We’ll do it differently next time, but there were several approaches we could take to do this, we tried one, and ultimately it did work.
Clampage.
And with the clamps off.
Then we added small pieces of mahogany around the inside of the cockpit combing. We had originally planned to put some thin, long strips of cedar around the inside horizontally, but that didn’t work out. Then we opted for this approach, which did work. Partly this was as a cosmetic thing, (not really necessary) but largely for some added strength.
After that we flipped the hull over to sand the bottoms of those pieces smooth and epoxying the bottoms of the hatch lips, and smearing a bit of epoxy in some other spots that needed it.

Go here for part 14 of the build: taking her out for a test spin.