1979 – Deru
This whole album is beautifully evocative ambient, but this is my favourite track off of it.
Saturday, 30 April 2016
Dundas Valley Hike
Met up with some friends for a wander in the Dundas Valley this past week. Gorgeous day, lovely scenery, terrific company, delicious treats – what more could a boy want?


 The walk in to meet up with everyone.

 Merrick Orchard.


 Some of the scenes along the Main Loop.
 I’ll let the sign do the talking.

 One of my very favourite things in Hamilton. The diorama of the Dundas Valley and its watershed. Press the buttons along the bottom and the various trails light up.
 Passed Sherman Falls on the walk home.


 And what I schlepped that day.


Friday, 29 April 2016
S.o.t.D. - Train Trac (Train-Abuse) – F.U.S.E.
Train Trac (Train-Abuse) – F.U.S.E.
Further Underground Sound Experiments was one guise for Richie Hawtin, (and I can’t recall if John Acquaviva was involved in this too, or Dan Bell). “Holy crap! This is nuts!” was pretty much my reaction on first hearing this.
Further Underground Sound Experiments was one guise for Richie Hawtin, (and I can’t recall if John Acquaviva was involved in this too, or Dan Bell). “Holy crap! This is nuts!” was pretty much my reaction on first hearing this.
Thursday, 28 April 2016
S.o.t.D. - One Step Forward – Max Romeo
One Step Forward – Max Romeo
Okay, so the video is the same 30, 40 seconds of Rockers repeated over and over. So what. Just enjoy the song.
Okay, so the video is the same 30, 40 seconds of Rockers repeated over and over. So what. Just enjoy the song.
A reminder....
A reminder that while I carry a heavy olive green pack for fun in a peaceful land on a gorgeous day, some guys once carrying heavy olive green packs never again had that luxury.


1" Bra G-Hooks rather than ITW G-Hooks (pt.2)
Thought I should do a follow-up on this, and report my findings.
Regrettably, I fear these aren’t as ideal as I had wished.

 As you can see, several months of tightening and being under tension has deformed them. I’ve sewn a few of these with two g-hooks, but doubt that will really be any better. Just not sure it’s meant to withstand the rigours I’ve been subjecting it to.
Bummer.
 And, amusingly enough, I managed to bust a ladder lock. Something I scrounged from Canadian army surplus, so this could well be 20 or more years old. Weak plastic to begin with, years of abuse on a piece of issued gear before I got a hold of it, my being too hard on it - who knows.
Regrettably, I fear these aren’t as ideal as I had wished.


Bummer.

Wednesday, 27 April 2016
Tuesday, 26 April 2016
Monday, 25 April 2016
Sunday, 24 April 2016
Saturday, 23 April 2016
S.o.t.D. - Fever – Tango
Fever – Tango
Great track from a guy that I suspect only put out a handful of things. And with a name for his act that makes it hard to find much else he might have done.
Great track from a guy that I suspect only put out a handful of things. And with a name for his act that makes it hard to find much else he might have done.
Friday, 22 April 2016
S.o.t.D. - Sweet Sax – Unison
Sweet Sax – Unison
So I’ve been digitizing old mixtapes. Starting out mostly with tapes my dear pal Jarkko gave to me .... around 20 years ago. To this day he is still my favourite DJ. And while many of the tapes haven’t been listened to in years - no tape deck hooked up - they still sound really damn good today. Getting them in a digital form means I can listen to them any time. Also, with the magic of Shazam, I can find out the names of many songs I never knew.
Like this utterly superb atmospheric D&B track.
Creamy.
Thursday, 21 April 2016
S.o.t.D. - San Narcisco – Maas
San Narcisco – Maas
No idea what this should be classified as - break beats, hard house? Not sure. All I know is this release by Ewan Andrew Pearson from 1995 is a total corker.
No idea what this should be classified as - break beats, hard house? Not sure. All I know is this release by Ewan Andrew Pearson from 1995 is a total corker.
Wednesday, 20 April 2016
Tuesday, 19 April 2016
S.o.t.D. - Wanted It More & More – Aphrodite
Wanted It More & More – Aphrodite
Another of those great D&B rollers, but the female vocals (by Gail McLean), helped smooth it out a bit. A gem from 1996.
Another of those great D&B rollers, but the female vocals (by Gail McLean), helped smooth it out a bit. A gem from 1996.
Monday, 18 April 2016
S.o.t.D. - Medicine – Rising Appalachia
Medicine – Rising Appalachia
I got an excited text from my pal Michelle at 02:00 telling me that I needed to go see Rising Appalachia at the Casbah that night. (And this is a gal that goes to a lot of concerts!) Checked them out and indeed, good stuff. Way hippy, but undeniably terrific. (Sadly, the show was already sold out.)
I got an excited text from my pal Michelle at 02:00 telling me that I needed to go see Rising Appalachia at the Casbah that night. (And this is a gal that goes to a lot of concerts!) Checked them out and indeed, good stuff. Way hippy, but undeniably terrific. (Sadly, the show was already sold out.)
Sunday, 17 April 2016
S.o.t.D. - A Man of Two Worlds (Extended mix) – Ultravox
A Man of Two Worlds (Extended mix) – Ultravox
Quite possibly, one of the best names for a band ever. Their music was pretty damn great as well.
Quite possibly, one of the best names for a band ever. Their music was pretty damn great as well.
Saturday, 16 April 2016
S.o.t.D. - Music Box – Roni Size & Die
Music Box – Roni Size & Die
I think this may have been the first thing I heard from mr. Size. That insanely catchy rhythm, with some of the jazzier elements that would inform his later work.
I think this may have been the first thing I heard from mr. Size. That insanely catchy rhythm, with some of the jazzier elements that would inform his later work.
Alley Graffiti Tour
I was in Toronto a while back, on one of my rare visits. Gorgeous day, and decided to wander up the lane ways. Some fun graffiti to be found there.


 The alley and buildings behind the Tranzac Club, my destination.


 Kensington Market.
 The laneway behind Queen, near Bathurst.
Nice to see this article, which articulates some of my thoughts about these laneways.
http://www.blogto.com/city/2016/04/a_love_letter_to_torontos_alleyways_and_lanes/


Not sure what lane way this, not sure what two streets it’s between. Up near Bloor anyway.


Nice to see this article, which articulates some of my thoughts about these laneways.
http://www.blogto.com/city/2016/04/a_love_letter_to_torontos_alleyways_and_lanes/

Friday, 15 April 2016
S.o.t.D. - Cold Light Of Day (feat. Sherry Davis) – Logistics
Cold Light Of Day (feat. Sherry Davis) – Logistics
I’ve featured several other tracks that fit this description: a kick ass drum & bass tune, which serves as the frame work for a really good and very emotive vocal track over top.
I’ve featured several other tracks that fit this description: a kick ass drum & bass tune, which serves as the frame work for a really good and very emotive vocal track over top.
Thursday, 14 April 2016
Wednesday, 13 April 2016


Tuesday, 12 April 2016
HPL MakerSpace
I think the library here is terrific. It just became even more terrific with the opening of their new maker space at the central branch, The Circuit 4.0, as it’s properly called. It’s been in the works for a while, and I was there bright and early last Monday morning when it opened. First person signed up, first paying customer. Very exciting!


 In another side room are Mac workstations. Meant for video, sound and photo editing, graphic design, CAD, animation, etc. There are also scanners, a few Wacom tablets, and the means to digitize VHS and cassette tapes. I’m particularly excited about this part.
Currently I’ve been using them to learn 123D Design. Working my way through “A Beginner’s Guide To 3D Printing: 14 Simple Toy Designs to Get You Started” by Mike Rigsby. (He also covers SketchUp in it.) Very rudimentary stuff, nothing I would actually want to print, but good to learn the tools and commands. They also have Blender installed, but since it’s also meant for 3D animation - a bit of a different beast than the CAD it can also do - it’s not a really intuitive program at first blush. 123D Design is simpler with a lot less frills. A bit less intimidating. With my library card I also have access to Lynda.com tutorials, including one for Blender. Which I will tackle at some point, but I just want to wrap my brain around one piece of software right now.
There are several printers that fall into the large format 2D category. At the time of writing they’re not fully functional yet, but before too long they will be.
 Epson SureColor T3270. A 24" wide, up to 2880 x 1440 dpi, up to 5 colour printer, with the capacity to do screen printing. It can also do up to 600 dpi colour scanning. The last two features in particular I’m excited about.
 Roland Camm1 GS24. A plotter that can cut a variety of substrates between 50 and 700 mm wide.
 Roland VersaStudio SignMakerBN-20. A 20" wide, 1440 dpi, four, maybe five colour, inkjet printer / cutter that can also print transfers for T-shirts.
All these machines I’m very excited about.
 Janome MC500E. Might look like a sewing machine, but it’s specifically an embroidery machine. It can do an area 7.9" x 11" at a speed of 400-860 stitches per minute, and theoretically however many colours you want to program and load. There is also a sizeable screen allowing for a lot of editing. Another machine I excitedly look forward to using.
 Makerbot Digitizer. A 3D scanner that can handle objects 20 cm in diameter and 20 cm high, and at a dimensional accuracy of 2 mm. Super excited about this.


 Yeah, and Lego Mindstorms too. How exciting is that?
So, on to the 3D printers.
 First one is the Ord Solutions RoVa3D. Which I can’t say very much about at this point because I haven’t used it yet. It’s similar in quality to the MakerBots, (it’s extruded PLA like the MBs) but it allows for multiple colours to be printed simultaneously.

 FormLabs Form 1+. This is a resin stereolithography (SLA) printer. It can print objects 125 mm (4.9") L × 125 mm (4.9") W × 165 mm (6.5") H in size, and at resolutions of 25 μm (0.001"), 50 μm (0.002"), 100 μm (0.004"), or 200 μm (0.008"). The cost to use this machine is 30¢ a gram.
Not as many colour options as some other types of 3D printers, but there is a clear, flexible and also castable resin, in addition to standard and tough resin.
 The very straightforward info screen. What the job is, how long till it’s done, and how many layers to go. And the button to turn it on and off.

 One thing that is interesting about this machine is that it prints upside down. The bed is at the top, and the object hangs from it. One of the downsides of this is that you can’t gauge what’s happening until it’s almost done. I printed one item that ended up being 4 times larger than I anticipated, but didn’t realize it till it was too late. With the MakerBot Replicator, if something is too large or small, you can determine that almost immediately and cancel the job. I suppose I’ll be able to gauge that from the amount of time a job takes and from the volume of resin. But being completely new to this, little missteps like this I take in stride.

 Two views of the resin bath.

 Two jobs in their PreForm software, I suppose the equivalent of RIP software for a 2D printer. So far it has been a very intuitive software to use. One of the things that is so different about this machine / mode of printing is that it requires supports. If it was printed on a bed, not fighting against gravity, this wouldn’t be necessary. The software does it for you automatically, but you do have a level of control.


 An example of something I had printed, a handcuff key. It demonstrates the supports generated to allow for printing. It could be counted as something of a disadvantage to this system: the amount of post processing involved. I don’t mind finicky detail work like this, but I can see how it could be a problem for some. And if there are delicate pieces, removing the stems and flash might damage them. They also leave behind little marks that can be felt and seen. Yes, you can very carefully scratch or sand them away, but there will still be evidence. There are times when this will not matter at all, but for other applications, it might well count as a negative. Horses for courses. And another problem with those stems is that I’ve printed things with threading. Trying to remove it from inside that threading? Oooy...not so exciting.
 I used the small knife on my SAK to remove this one. It worked, but I think the potential for damage (to the object and wielder) is greater with this approach. I’ve used the SAK scissors as well. Which worked much better. But I think some very fine jewellers wire snips might be the best tool to use.


 While it is finicky to remove the supports, the quality of what emerges from the FormLab is superior. (The printing also takes considerably longer on this printer as well.)

 A 13 sided die I had printed. Or a triskaidekagon. Much bigger than I had thought it would be. It’s all a learning experience.
 A bass clef guitar pick for my bass guitar playing nephew. It’s not structurally sound enough to be functional, but it could work as jewelry.

 A book holder open thingy. This thing is solid. Feels like ABS and whatever the hard plastic is that’s used in a Nalgene bottle.
 Handcuff keys. Even something that small will take an hour or more to print.
 An example of a key off the Replicator (left), and one from the Form 1+ (right), showing the difference in quality. I’ve taken a file to the black one in an effort to smooth it out a bit.
 Octopus. They’re exciting too.
 Two different tubes. Again, nothing at all flimsy about these. The top one, had part of the threading collapse during the printing. The Form 1+ can and does sometimes misprint.
I’ve been most excited so far about this machine.
 MakerBot Replicator. Probably the 3D printer that has gained the most traction, certainly for the home market. It can print objects 25.2 cm (9.9") L x 19.9 cm (7.8") W x 15.0 (5.9") H in size and with a volume of 7,522 cubic cm (456 cubic inches). The cost to use this machine is 10¢ a gram.

 Starting to print a thread holder.
 And well into the process.
Some other examples of objects printed on it.
 Compare the quality of this with the other guitar pick I printed, above.


 The quality of much of what emerges from this printer isn’t nearly what emerges from the FormLabs Form 1+. It can be seen best on the guitar pick above. The striations or lines are much coarser, and there are areas not sufficiently filled in. I guess it’s like printing 2D - the difference between an inkjet proof and a final dye sublimation print. If I was creating something and needed to gauge how it was proceeding, determine size, etc., this would be fine. For a final product, I would use a different printer.
I haven’t been as excited about the Replicator, but it is still exciting in its own right.
So far, I’ve been super excited with the opportunities afforded. The staff have been fantastic. I can only imagine this has been like drinking from a fire hose for them. Mastering the intricacies of just one of these procedures and its accompanying hardware and software would be challenging. A whole bunch of new machines and software and processes? I imagine there will be a few hiccups. As an early adopter I’ve helped discover a few of those hiccups. And I don’t mind in the slightest. Several of them have half-jokingly referred to me as their beta tester.
The means of paying is another issue that likely needs to be ironed out. With printing to paper, you can throw some money on your account, and each time you print something, it deducts the amount from your account automatically. Easy. Here, you either have to pay via Interac (kind of silly when the fee will be more than the actual price), or get a receipt, go to the main floor and pay with cash. Since all this is new even to the people there, it’s not so straightforward a procedure. Just another bump in the road that I’m sure will smooth out in time. But the same system used for paying for printing to paper, would be ideal. Because this part of it hasn’t been very exciting.
But all in all, yes, you guessed it – very exciting stuff.

The main room showing some of the 3D and large format printers.


In one of the side rooms is a green room for shooting videos and product shots. (As someone who creates products, but hasn’t got a good setup for photographing them, I’m excited about that part.)


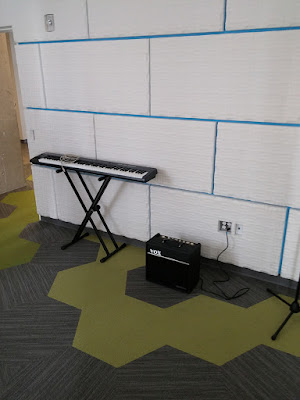
In another room is a sound recording studio, complete with a selection of instruments. (I took my 12 year old, multi-instrumentalist nephew here and he’s really excited about this part.)


Currently I’ve been using them to learn 123D Design. Working my way through “A Beginner’s Guide To 3D Printing: 14 Simple Toy Designs to Get You Started” by Mike Rigsby. (He also covers SketchUp in it.) Very rudimentary stuff, nothing I would actually want to print, but good to learn the tools and commands. They also have Blender installed, but since it’s also meant for 3D animation - a bit of a different beast than the CAD it can also do - it’s not a really intuitive program at first blush. 123D Design is simpler with a lot less frills. A bit less intimidating. With my library card I also have access to Lynda.com tutorials, including one for Blender. Which I will tackle at some point, but I just want to wrap my brain around one piece of software right now.
There are several printers that fall into the large format 2D category. At the time of writing they’re not fully functional yet, but before too long they will be.


All these machines I’m very excited about.


So, on to the 3D printers.


Not as many colour options as some other types of 3D printers, but there is a clear, flexible and also castable resin, in addition to standard and tough resin.


I’ve been most excited so far about this machine.


Some other examples of objects printed on it.


I haven’t been as excited about the Replicator, but it is still exciting in its own right.
So far, I’ve been super excited with the opportunities afforded. The staff have been fantastic. I can only imagine this has been like drinking from a fire hose for them. Mastering the intricacies of just one of these procedures and its accompanying hardware and software would be challenging. A whole bunch of new machines and software and processes? I imagine there will be a few hiccups. As an early adopter I’ve helped discover a few of those hiccups. And I don’t mind in the slightest. Several of them have half-jokingly referred to me as their beta tester.
The means of paying is another issue that likely needs to be ironed out. With printing to paper, you can throw some money on your account, and each time you print something, it deducts the amount from your account automatically. Easy. Here, you either have to pay via Interac (kind of silly when the fee will be more than the actual price), or get a receipt, go to the main floor and pay with cash. Since all this is new even to the people there, it’s not so straightforward a procedure. Just another bump in the road that I’m sure will smooth out in time. But the same system used for paying for printing to paper, would be ideal. Because this part of it hasn’t been very exciting.
But all in all, yes, you guessed it – very exciting stuff.
Subscribe to:
Posts (Atom)


