What is turning into a bit of an annual tradition, I again trekked down to my regular, quite private spot to view the Canada Day fireworks from.
Where I was going. The mythical “land on th’other side.” Vulture soaring on the thermals created by the Iroquois Bar.
How I would be getting to th’other side. Valley Inn Bridge in the distance.
Lots of vultures soaring on the thermals. Must be something foul and rancid and awful tasting down there.
That dude looks like he is really cool.
Whoah. A backpack that he designed and made. He is really cool!
Stopped to smell the flowers.
I told those damn swans to clear out. Said I was now the supreme ruler of this peninsula. They didn’t listen. Given that they can break a leg with a swipe from their wings, I decided not to press the issue.
Stack of twigs and sticks for the stove.
Not the ideal tool for the job, but my Spyderco Tenacious did an admirable job splitting some of the thicker wood into smaller pieces. I would usually prefer a stouter knife for this task, but I think it should be within the capacity of a knife like this.
Since the BushBuddy has a fairly small aperture, I needed get a few of the pieces too thick to snap to size cut down. Not having my Laplander with me, I used my trusty Huntsman’s saw, and as expected, it worked fine. Decent saw in a pinch.
The view.
Used my BushBuddy.
Cup of tea.
Bridge and boats.
Time to stoke the fire back up. If there is a drawback to the BushBuddy it’s that it burns hot and fast, can only burn small finger sized pieces of wood and requires a constant feeding of wood. It can only go for a few minutes before it needs a top up. Given that the spot I was on was a sandy spit and the only wood available to me was willow, might have had something to do with it too. Perhaps if I was burning maple or oak, it might burn slower.
Fire is so great. I wish I had the chance to have a little fire like this every day. Good for the soul. Had that thing going for three hours.
Still life with pack.
Good thing I had that operation to have all my nerve endings removed so I feel no pain.
Iroquois Bar.
The fireworks were okay. Given that I know the pictures will turn out badly, I never bothered to take any photos. Hiked back up the cliff and out through the cemetery without ever turning on my flashlight and then home.
Happy Canada Day! I love living in this country.
Showing posts with label BushBuddy. Show all posts
Thursday, 4 July 2013
Thursday, 30 December 2010
Bush Buddy
On a few different trips recently, I opted to take my BushBuddy rather than one of the usual alcohol stove set ups I use. I knew it was going to be cold, and I knew I wanted to have an actual fire to help stay warm.
Besides its obvious utility as a means of boiling water and cooking food, it’s also a nice self contained fire box.
The pot looks a bit unbalanced, but it’s actually balanced better with it off to the side a little bit given the slight slope of the terrain.
In front of the wikiup. I know it looks precarious, but it really did feel more securely balanced off to the side a bit.
Cupatea.
I was using the knife to split small pieces of wood even smaller. Only twigs and very thin branches are needed to fuel it. It does require almost constant attention though, and a very steady feeding of wood. Which has to be done very gingerly as the slot is small, has flames licking out, and a pot of hot water sits there.
As much as I like alcohol stoves for the convenience on a hike of known duration, not to mention the lack of noise and smell, and lack of sooty pots, a wood stove has the edge when the trip will last an unknown length of time, warmth is needed, water needs to be boiled for bathing, etc. In addition to that, there is something so awe inspiring about a fire. Sadly, I live in a modern city, and a fire is something I get to enjoy very, very rarely. For millennia, a fire was a daily occurrence for almost everyone. Now, our use of an actual fire has been drastically curtailed. Yes, yes, it probably is safer not to have fires in densely packed cities. But I think it’s fair to say, we would never have gotten to the point of even having cities, let alone be able to worry about the safety of the issue, without having attained mastery of fire. I think that connection with fire is so utterly primal, and not experiencing it on a daily basis leaves a void in our psyche, whether we realize it or not. I somehow feel amazingly “right” when I’m sitting next to a fire.
Saturday, 26 June 2010
MSR Titan Kettle
I wish there was a way to deduce the ultimate gear set up just from looking at a picture in a catalogue, buy it and be done with it. Alas, it often takes some trial and error to get the perfect setup dialed in.
About the only thing that I made specifically for this was a wind screen.
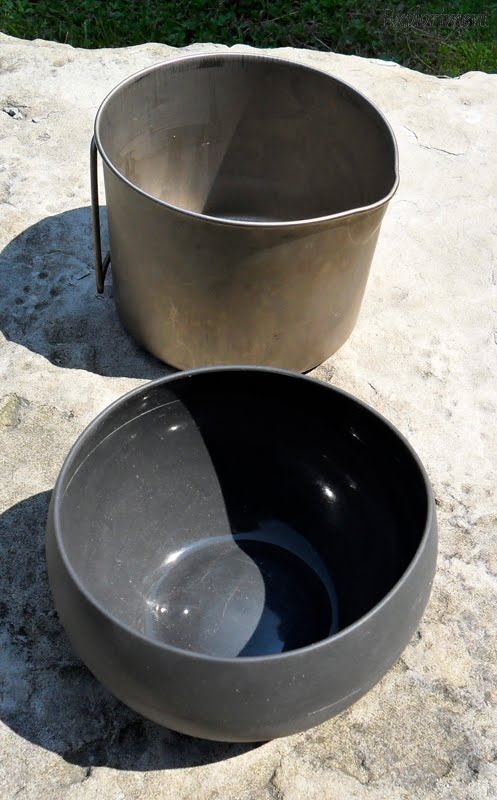
I tried various approaches to what could all be fit inside the kettle, and one of the things that fits fairly well is a Guyot Designs Squishy Bowl.
This makes for a nicely compact cooking system. Certainly as compared to the Caldera Cone or BushBuddy. I like each of those systems and they each have their place, and serve a niche. The Caldera Cone I will likely keep for canoe trips or trips in a vehicle where weight and room aren’t as much of an issue, and the BushBuddy is great for cold temperatures or extended duration trips. But for a lot of what I do, which is day trips to three day hikes and hang’mups, where I want to keep my pack size and weight down, this is a pretty ideal set up.
The other thing that’s great about this set up is that it fits perfectly inside the Camozy.
Since it all works in conjunction anyway, it makes sense to keep it all together.
Oh and the weight of the whole set up as you see it there, with the cozy, is 430 grams.
Cooking setups being a case in point.
I’ve made a whole bunch of alcohol and wood burning stoves, wind screens, pot stands, I’ve tried a few different multi-fuel and canister stoves, a variety of pots, etc. I have a BushBuddy, and a Caldera Cone. They all have their good points, they all service a niche, but alas they also all have their own drawbacks.
Besides striving to reduce the weight of what I’m lugging about, I also want to reduce the size of what goes in my pack.
I’ve been the very happy owner of an MSR Titan Kettle for a few years now. Of all vessels I have to boil or cook in, it’s by far my favourite. The handles don’t flap around or clang, the lid stays on securely, there is a pour spout, the handle on the lid can lie flat for storage but be secured upright when in use to make removing it easier, the size is just right for one or maybe two people, there is a tiny hole in the lid to serve as a whistle to let you know the water has boiled (I could do without that feature personally), it’s made out of titanium, which is always cool.
I decided to put together a cook set that was completely contained within the Titan Kettle.
Now this was my first stab at it.
About the only thing that I made specifically for this was a wind screen.
I needed one that would fit perfectly within the kettle, so I utilized a printing plate. I’ve used many things to make wind screens. A disposable aluminum baking tray liner is very easy to work (scissors and a hole punch will work), but probably won’t survive for a really long time. I’ve also used tooling foil. Easy to work and has held up very well. Some people use roofing flash, which is very sturdy, but heavy and more difficult to cut and drill. Here I decided to experiment with printing plates. Flexible, yet a bit stiffer than some other stuff I’ve used and still easy to work. And for me, they’re easy to acquire and free.
I decided to try one without the usually recommended air holes at the bottom. Just for the heck of it. If it didn’t work, it’s not a big deal to add some holes. I made two others at the same time with two different vent hole arrangements. I’m not sure how well printing plates will hold up long term. The look of the discoloration I’m fine with. But after a quick trial session they felt a bit weakened in the discoloured areas. I don’t know if the chemicals the plates are coated with have anything to do with it. But that’s all part of the experiment. Try things out, see what works, see what doesn’t. Gives me an excuse to get out for a hike. Not that I really need one.
I cut all three wind screens to the length that I did so that I could either close it around the opened handles...
...or with the handles folded in.
I played around with a few different stoves. (I have dozens to choose from.) Due to it’s small size, I had to try the Gram Weenie Stove. (The instructions to make it if you’re crafty. The place to buy it if you’re not.)
Great little stove – light, small, efficient – but its small size makes it suitable more for a very narrow pot like the Snow Peak Mini Solo. With a slightly wider pot like the Titan Kettle, it’s a bit too wobbly for my liking.
As I mentioned I have made loads of alcohol stoves. One of the ones I like the most, and was absolutely the easiest to make was the (what is alternately known as a) FancyFeast or SuperCat. It takes up a bit more room in the kettle, but I think this is the one I will go with.
Both of these stoves serve as their own pot rests, due to the jets being on the sides of the stove. A stove design that has the jets on the top requires a separate pot stand of some sort. Not a big deal, but I thought I would like to try and avoid that as it just means more stuff in the kettle.
Some stoves require measuring, cutting, sawing, drilling, shaping, gluing, riveting, etc. This one can be made by an all thumbs on two left hands klutz. A cat food can and a hole punch is all that is required. And it works really well.
Great little stove – light, small, efficient – but its small size makes it suitable more for a very narrow pot like the Snow Peak Mini Solo. With a slightly wider pot like the Titan Kettle, it’s a bit too wobbly for my liking.
As I mentioned I have made loads of alcohol stoves. One of the ones I like the most, and was absolutely the easiest to make was the (what is alternately known as a) FancyFeast or SuperCat. It takes up a bit more room in the kettle, but I think this is the one I will go with.
Both of these stoves serve as their own pot rests, due to the jets being on the sides of the stove. A stove design that has the jets on the top requires a separate pot stand of some sort. Not a big deal, but I thought I would like to try and avoid that as it just means more stuff in the kettle.
Some stoves require measuring, cutting, sawing, drilling, shaping, gluing, riveting, etc. This one can be made by an all thumbs on two left hands klutz. A cat food can and a hole punch is all that is required. And it works really well.
Add alcohol to the stove (you become very good after a while at knowing exactly how much is required for boiling given amounts of water), put a little bit in the primer pan under the stove, light it and in a moment the alcohol in the stove lights.
The weird thing about alcohol is that in daylight it’s not easy to tell if it’s burning or not. The flames are invisible. Most often it does light, but there are times when it doesn’t. Today I could see vapours on the rock, and sometimes you can see bubbles form and pop in the alcohol, or hear a slight hissing sound. I usually do a quick pass a few inches over the stove with a finger to feel the heat.
Center the windscreen around the stove...
...center the pot on top of the stove...
....and put the lid on. Or you can put the lid on the pot, make sure it’s square on the stove and drop the wind screen around it. :-) The lid clicks on to the pot fairly securely. Since all I ever really do with this is boil water, that’s fine with me. If someone were to actually cook something in there, and need to stir often, they might want to just rest the lid on top like I did in the photo.
Oh and a hint about titanium pots. Make sure you put the water in before you put it on the flame, otherwise you’ll get a crazy anodized pattern in the bottom of it. Ask me how I know.
....and put the lid on. Or you can put the lid on the pot, make sure it’s square on the stove and drop the wind screen around it. :-) The lid clicks on to the pot fairly securely. Since all I ever really do with this is boil water, that’s fine with me. If someone were to actually cook something in there, and need to stir often, they might want to just rest the lid on top like I did in the photo.
Oh and a hint about titanium pots. Make sure you put the water in before you put it on the flame, otherwise you’ll get a crazy anodized pattern in the bottom of it. Ask me how I know.
I tried various approaches to what could all be fit inside the kettle, and one of the things that fits fairly well is a Guyot Designs Squishy Bowl.
Unfortunately it made getting everything else I needed to get in there very tough. Bummer, since its size made it a pretty versatile item.
This is what the set up is now.
A bandana to grab the handles with, wipe the kettle after use, etc., etc. A big part of what it does though is stop everything inside from rattling around.
A Fold-A-Cup, which you can see in more detail here.
A bandana to grab the handles with, wipe the kettle after use, etc., etc. A big part of what it does though is stop everything inside from rattling around.
A Fold-A-Cup, which you can see in more detail here.
Bic lighter, two fuel bottles, stove, primer tray. (Here you can really see what putting an empty pot on a flame does to the titanium. Whoops.)
Spent quite a bit of time trying to figure out what bottle would serve best to hold the alcohol. Found that Purell hand sanitizer bottles were the right height (or length once you lay them on their side) to fit in the kettle, and the fact that they’re rectangular-ish makes them more packable. This is enough fuel for two days. Now I just need to put some of these warning labels on them.
I suspect I might do a bit of tweaking to it yet, maybe cut down a spoon to fit in there, but by and large it’s how I want it. I wish I could have a bigger cup, but what I have will suffice. It’s going to take a bit of testing over time to see how durable those printing plate wind screens are. Maybe they’ll be just fine, and maybe I’ll have to swap them out with screens made from something else.
Spent quite a bit of time trying to figure out what bottle would serve best to hold the alcohol. Found that Purell hand sanitizer bottles were the right height (or length once you lay them on their side) to fit in the kettle, and the fact that they’re rectangular-ish makes them more packable. This is enough fuel for two days. Now I just need to put some of these warning labels on them.
I suspect I might do a bit of tweaking to it yet, maybe cut down a spoon to fit in there, but by and large it’s how I want it. I wish I could have a bigger cup, but what I have will suffice. It’s going to take a bit of testing over time to see how durable those printing plate wind screens are. Maybe they’ll be just fine, and maybe I’ll have to swap them out with screens made from something else.
This makes for a nicely compact cooking system. Certainly as compared to the Caldera Cone or BushBuddy. I like each of those systems and they each have their place, and serve a niche. The Caldera Cone I will likely keep for canoe trips or trips in a vehicle where weight and room aren’t as much of an issue, and the BushBuddy is great for cold temperatures or extended duration trips. But for a lot of what I do, which is day trips to three day hikes and hang’mups, where I want to keep my pack size and weight down, this is a pretty ideal set up.
The other thing that’s great about this set up is that it fits perfectly inside the Camozy.
Since it all works in conjunction anyway, it makes sense to keep it all together.
Oh and the weight of the whole set up as you see it there, with the cozy, is 430 grams.
Subscribe to:
Posts (Atom)